You can easily extend your current Veeam Backup & Replication setup to the Antyxsoft Cloud Veeam platform by adding the Antyxsoft Cloud repository as a Service Provider in your existing infrastructure.
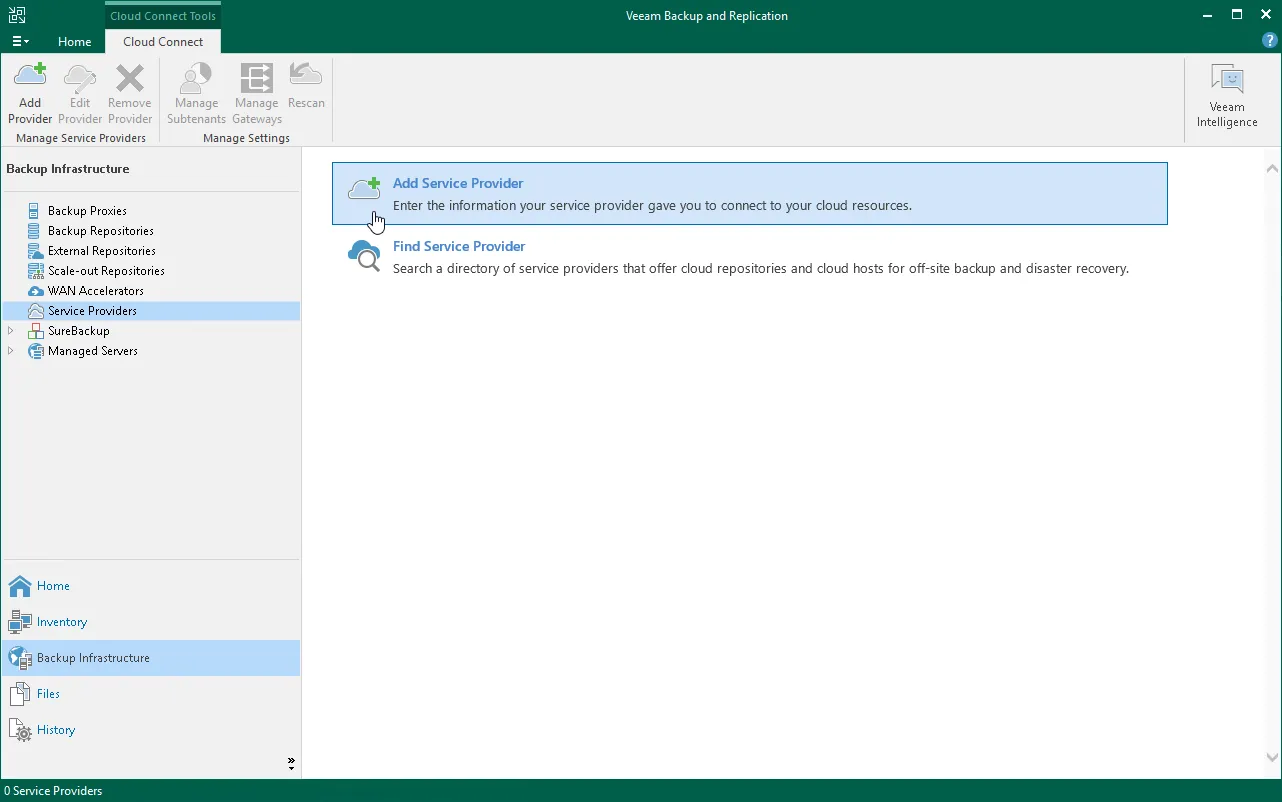
Step 1 — Add the Service Provider
- Open the Backup Infrastructure view in the Veeam console.
- In the inventory pane, select Service Providers, then click Add Provider on the ribbon.
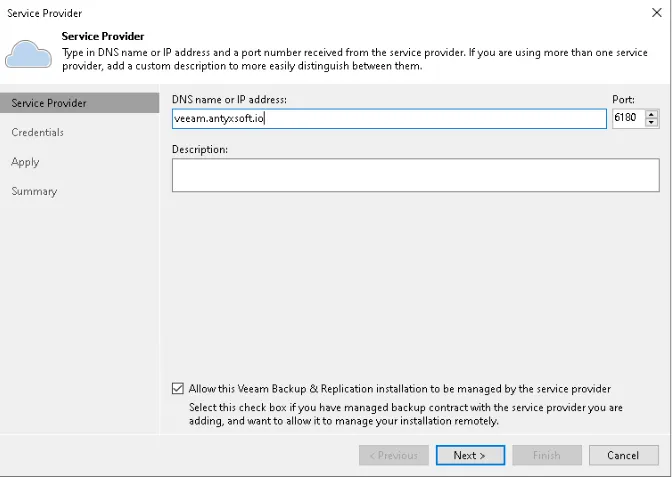
In the DNS name or IP address field, enter one of the following available endpoints: Available Endpoints:
- veeam.antyxsoft.io
- veeam-gr01.antyxsoft.io
- veeam-usa01.antyxsoft.io
In the Port field, specify: 6180
(Optional) In the Description field, enter a short description for the Service Provider.
If your Service Provider should manage your Veeam Backup Server under a Backup as a Service agreement, select the checkbox: Allow this Veeam Backup & Replication installation to be managed by the service provider.
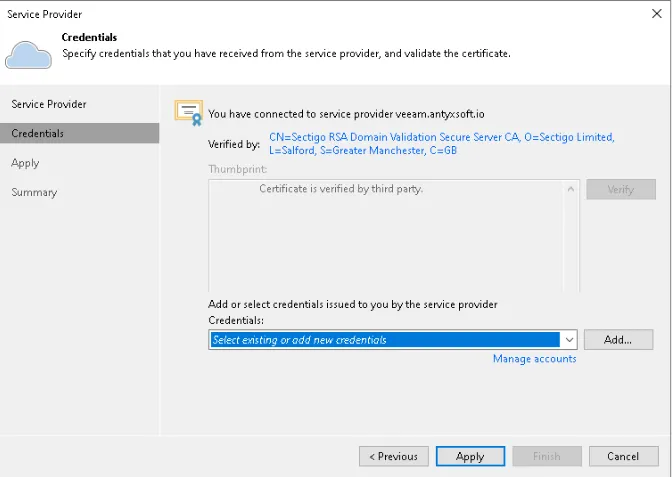
- At the Credentials step of the wizard:
- Verify the TLS certificate information.
- From the Credentials list, select the tenant account credentials provided by the Service Provider.
- If you have not created credentials yet, click Manage accounts or Add to create a new set.
At the Resources step, Veeam Backup & Replication will automatically enumerate the resources available to your tenant account on the Antyxsoft Cloud repository.
Wait for the enumeration process to complete, then click Next.
At the Apply step, Veeam will:
Save the Service Provider configuration.
Deploy the necessary Network Extension Appliances on your production host (if applicable).
Wait for all operations to complete, then click Next.
At the Summary step:
- Review the configuration details for the newly added Service Provider.
- Click Finish to complete the setup.
Your Veeam Backup & Replication infrastructure is now connected to Antyxsoft Cloud Veeam.